Graphic Organisers - Spider Diagrams
9th September 2025
Written by Chris Hyde
Welcome to the fifth and final blog in our series on graphic organisers!
.
Time to recap on what graphic organisers are via retrieval practice:
They are visual tools that break a topic down into its key areas and shows how they link together
They can be used across the curriculum
They are backed by research, such as in in multiple EEF Improving Literacy guidance reports, cited by The Bell Foundation as making curriculum content more accessible for EAL learners and endorsed by SENsible SENCo as a valuable aid for students with cognitive difficulties
They have the flexibility to be used throughout any lesson, such as whole-class discussions, plenaries, retrieval practice or group work for oracy and collaboration
.
For this last graphic organiser blog, we are going to focus on spider diagrams, which enable a large amount of information to be displayed visually to show the bigger picture of a central idea. They subtly thread the vital, yet infrequently specifically taught, skill of note-taking and how to boil an idea down to its most essential components. Often used as a planning tool for extended writing in English, they have many other uses in the classroom to show how pieces of information link to, and branch from, a core concept, which is where the tenuous name comes from as the ideas building from that central theme resemble a spider (if you squint and use your imagination a bit, and pretend that the spider doesn’t have eight legs… but you get the idea).
Depending on the use, the number of branches that radiate from the middle can be anything more than one. It is usual to see four, five or six branches but there can be more or less than this, although be mindful that more branches mean less room to populate each of them. Our template has pre-designed spider diagrams for two to six branches, but the editable version can be adapted for more than this.
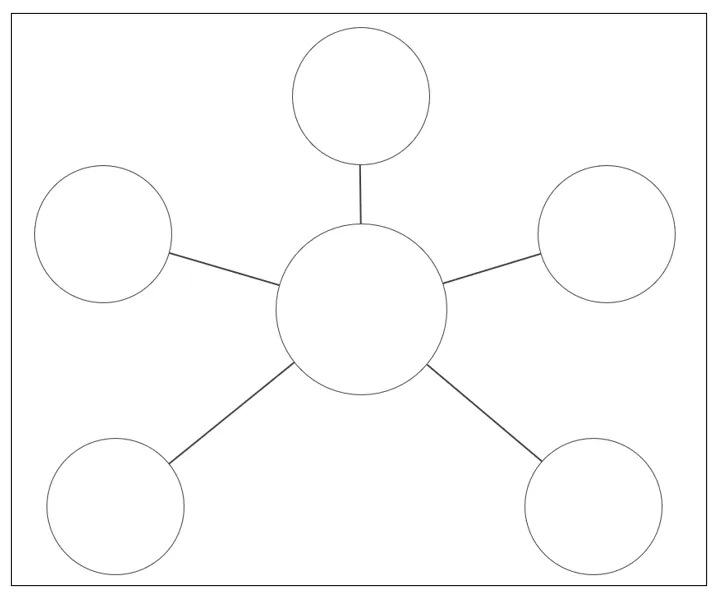
At its most basic, a five-branched spider diagram looks like this:
So far, so good!
Let’s imagine this is being used to plan a piece of writing across the curriculum in Year 6 science when writing a biography of Charles Darwin. The core concept will go in the middle and the related ideas will go in the circles at the end of the branches.
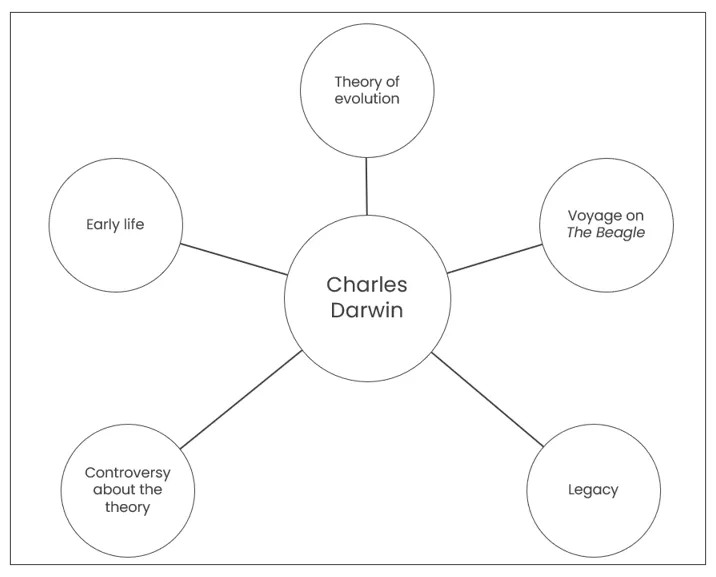
Note that these are written as short to-the-point phrases; these will lend themselves well to sub-headings for this genre of writing, but also denote the theme of each section which helps when organising paragraphs around a theme as children start to familiarise themselves with this in lower Key Stage 2. In terms of organisational thinking, these could be seen as the five most important chapters in Darwin’s life but not the only five possibilities for this; children must understand that the branch titles are not fixed and are open to their personal interpretation for how best to organise the given information.
In terms of producing a biography from this, the branches are somewhat random so would not produce a chronological story of Darwin’s life. An easy adaptation is to number these in chronological order (1 for early life, 2 for voyage on The Beagle etc) so that the focus during the graphic organiser stage is on getting information down rather than the sequencing of it.
The next step is to populate the five branches with the key information that comes under each title. Again, these will be done as concise points rather than prose (another benefit of spider diagrams is how information is structured in an easy-to-understand way, making them accessible for many learners).
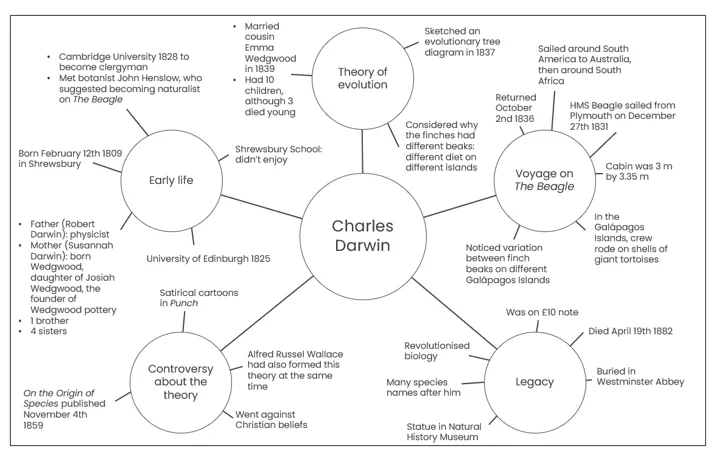
The sub-branches that link each idea to the branch as they were generated are crucial to understand what information belongs to which part of the diagram. It is also arguable that the important point about his children doesn’t belong in the theory of evolution branch and could be part of a sixth branch called ‘family’ or ‘home life’, but discussing different approaches to spider diagrams on the same topic could provoke more critical thinking within your class!
These sub-branches could even be developed further with more information branching from them (sub-sub-branches?), highlighted in red in the final iteration of this:
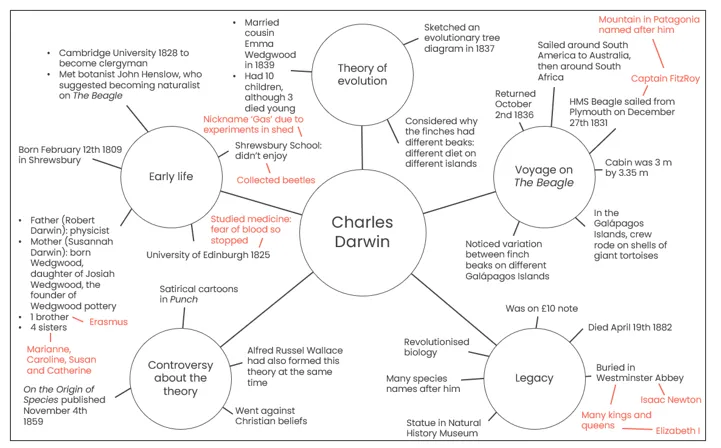
At which point we’re probably hitting cognitive overload! Note that this is a lot more complicated and crowded than would be expected from most pupils and is here as an example only; however, it shows how many details can quickly be added to a single topic and built up to create a comprehensive overview.
A spider diagram could be used in different ways – children could be given the central concept with a pre-determined number of branches to complete fully, or the central concept and branch names already filled out for information to branch out from that, or they could even be given a starting point of just the labelled central circle to draw as many branches as they see fit (with this, it is always best to write the label first then draw the circle around it rather than try to squeeze something that might not fit inside a circle!). They are flexible enough to meet the needs of different learners at different stages. As outlined above, however, deeper understanding opportunities are crucial to develop critical thinking further – why has that title been used, why has that piece of information been included or why has this piece of information not been included, for example.
.
As with previous graphic organisers, a spider diagram can be used across the curriculum, such as:
English: mapping out key themes in a text and explaining what events count as evidence
Maths: sorting different properties of shapes, with examples for each as branches
Geography: exploring factors that affect the weather in a specific location
History: quantifying five important inventions, with reasons for the importance as branches
Science: plotting out types of animal and examples of each
Art: organising information about a studied artist
Computing: planning different strategies for staying safe online
PSHE: mapping out a central emotion and branching out causes, physical signs and strategies to deal with it
.
They are much more versatile than just being used as part of planning a piece of writing in English! They also work well for harvesting knowledge as a starter activity, as a plenary or as a retrieval practice exercise. There is also the possibility of developing further to help knowledge retention, such as using colours to highlight the most important branches or drawing concepts as images instead of words.
These simple but powerful graphic organisers are a great way to support children to make connections between ideas and organise information. Click here to download an editable PowerPoint version if you wanted to move the branch locations or click here to download a PDF version that’s ready for you to print out and use. Both downloads contain spider diagrams with two, three, four, five and six branches.
Spider diagrams are a deceptively simple yet powerful graphic organiser that can support learning across the curriculum. Their visual structure helps pupils organise, connect and condense information in a way that supports both clarity and creativity. Whether it’s gathering ideas, sorting information or just making sense of something new, they're flexible, accessible and easy to adapt to different needs while also promoting deeper thinking, which is exactly what makes them such a handy addition to any teacher’s toolkit.
If this has sparked an idea on how you can use a spider diagram to develop your pupils’ thinking, remember to let us know at hello@classroomsecrets.co.uk as we would love to hear all about it! Remember that the other blogs in this series about graphic organisers are also online (charts, Venn diagrams, Carroll diagrams and the Frayer model).
To wrap up this series of blogs, we should give a shout-out to the classic Sue Palmer big books on different genres of writing, which include graphic organisers on how each genre can be written. If you can find any tucked away in a teacher cupboard somewhere, they are still well worth using in the classroom! The recently-published writing framework also includes graphic organisers for writing, using burger and temple models.
Now that we've explored five different types of graphic organisers (charts, Venn diagrams, Carroll diagrams, the Frayer model and spider diagrams), it's worth thinking about how they can help children become more independent learners. If pupils understand that a Venn diagram is great for comparing things, for example, they’re more likely to use one themselves when faced with a comparison task in science, DT or any other subject. By helping children see the purpose behind each organiser and how it can be used, we’re giving them the tools to choose the right one for the job—building confidence, independence and deeper thinking along the way. Graphic organisers are not just visual aids; they are thinking tools to help pupils make sense of their learning to develop ownership. After reading these five blogs, we hope you agree!


Try us today!